| A1 Electric Automotive Accessories |
| Installing Power Windows in a 1968 Camaro |
| HOME | ELECTRIC LIFE POWER WINDOWS | INSTALLATION ARTICLES | KEYLESS ENTRY & ALARM SYSTEMS |
| OE Replacement Motors | Switch Kits | Power Door Locks | Spal Accessories | Pop Doors | Colibri | Classic Car Windows |
| ONLINE CATALOG & APPLICATION GUIDE |
|
Part 1 This article shows a typical 68-69 Camaro / Firebird 4 door power window installation. Only the mechanical portion of the installation is shown in the photographs in this article
|
|---|
|
|
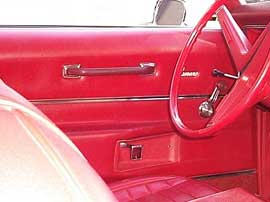
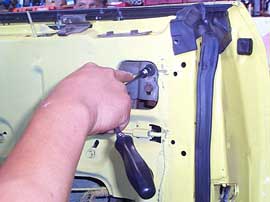
The installation is started by carefully removing the handles, pull straps and trim panels from the door panels. Using a door panel clip tool or similar tool, the door panel is carefully pried off of the door. Care must be taken so that the 30 year old panels aren't broken. If the paper liner is still there, it should be carefully removed, so it can be replaced later. |
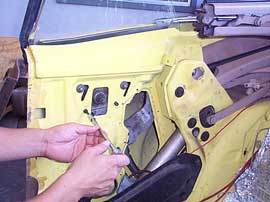
| The manual regulator is unbolted from the door and the glass sash is unbolted from the window. The manual regulator is then removed through the large hole in the door. At this point our installer checks the integrity of the glass channels, guides and rollers. Any worn components are replaced at this time. The window must move smoothly in the door before installing the new regulators. The Electric-Life power window regulator is then inserted into the door. This kit completely replaces the manual assembly. |
|
|
|
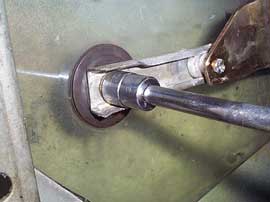
The 2 rollers on the new regulator slide onto the rail in the glass channel. The regulator is loosely mounted to the door. The short rail on the door (Just above large hole) is removed and placed onto the remaining roller. This rail is then bolted back onto the door in the same position it was taken off in. |
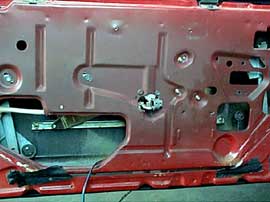
| With the regulator, glass sashes and channels lined up properly, the nuts and bolts on the door and glass are all tightened. Notice that the new regulator mounts completely towards the center of the door. The holes and area where the crank handle was are now empty. |
|
|
|
This is one of the many adjustments that Camaro doors have. You can adjust the height of the glass in the front and rear of the window. The inward kick can be adjusted. The angle of the glass can also be adjusted. In order to have your windows work properly, all of these adjustments must be correct. |
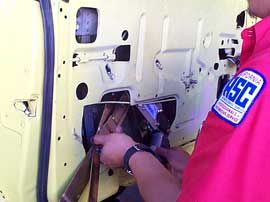
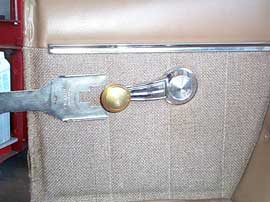
| To install the power window kit in the rear, the rear seat must first be removed. The lower part of the panel is unscrewed and removed, then the window crank handle is removed. |
|
|
|
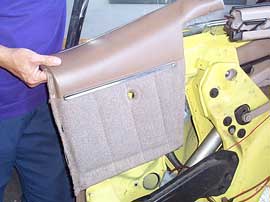
The panel is carefully pulled out and up out. This convertible model had an inner metal cover that also needed to be removed to gain access to the regulator. |
| The original regulator is then unbolted from the quarter panel. |
|
| This concludes Part 1 of the installaton. The rest of this project
is shown in PART 2 |
Ready to Order?
Need Prices?
Use our Online Catalog & Application Guide!
![]()
We have thousands of items in stock and ready
to ship!
A1 Electric Automotive Accessories
Local (310) 328-8500 Toll Free (888) 838-0506
Contact A1 Electric by Email
Ready to checkout?

SHOPPING CART
Home |
Company Information |
Ordering Information |
FAQ's
Electric Life Power Windows |
Installation Articles |
MES Power Door Locks
Alarms & Keyless Entry |
Power Window Switches |
OE Window Lift Motors |
Colibri Power Windows
Accessories & Pop Door Kits |
Street Rod Window Kits |
SPAL |
Classic Car Windows |
Speedometer |
Links to other Sites
Tech Articles & Information
Mustang |
Chevelle |
Dodge Ram PU |
Door Lock Installs |
S10 Window Motor |
Maxima |
Grand Am |
Silverado Windows
Cable Locks |
Tacoma |
Tacoma Tech |
Ford F150 |
55 Chevy |
Volvo |
Chevy PU |
Camaro |
VW Golf |
Chevy PU
Chevy Astro |
Caravan |
VW Beetle |
Colibri-Astro |
Mopar |
Focus |
Silverado Door Locks