
| A1 Electric Automotive Accessories |
| Installing Power Windows in a Toyota Tacoma, Part 2 |
| HOME | ELECTRIC LIFE POWER WINDOWS | INSTALLATION ARTICLES | KEYLESS ENTRY & ALARM SYSTEMS |
| OE Replacement Motors | Switch Kits | Power Door Locks | Spal Accessories | Pop Doors | Colibri | Classic Car Windows |
| ONLINE CATALOG & APPLICATION GUIDE |
|
|
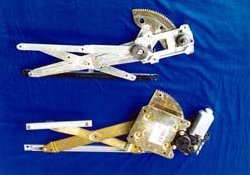
Here we can see the manual regulator and the Electric-Life power window regulator, side by side. Electric-Life components are designed to fit and perform like factory parts. |
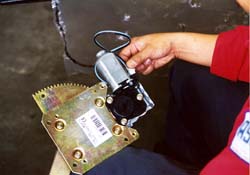
| Our installer connects the motor wires before installing the regulator in the door. |
|
|
|
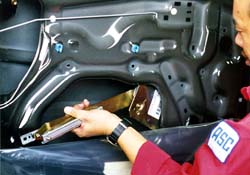
Next, the power window regulator is inserted into the door. It's a good idea to check the orientation of the regulator before inserting it into the door. |
| The holes in the regulator mounting plate must be aligned with the holes in the door. Notice that there are 4 mounting bolts which hold the regulator to the door. The manual regulator only used 3. |
|
|
|
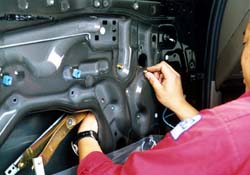
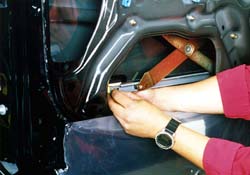
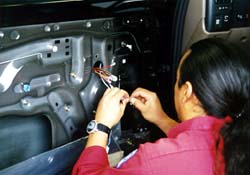
With the regulator secured to the door, the window is moved until the rail on the regulator matches the rail on the window. The 2 bolts are lined up and secured. |
| Care must be taken to ensure all mounting hardware is securely fastened. |
|
|
|
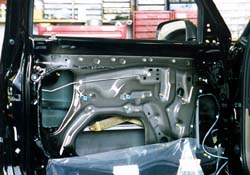
The Electric-Life regulator is now mounted in the door. If we didn't know better, we would swear that this was a factory Toyota part! |
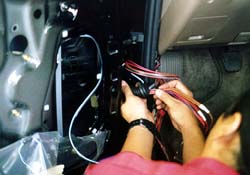
| Our installer is removing the rubber boot that connects between the door and the cab. All of the wiring will be routed through this boot. |
|
|
|
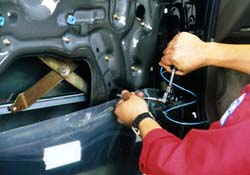
The wiring loom that comes with the switch kit is run from the cab into the door via the rubber boot. Running the wires through a rubber boot or a pair of grommets ensures us that the wiring will not chafe and short on the metal. |
| After the wires have been run, the boots are reinstalled and the wires are terminated. Care is taken not to place the wires in the path that the window or mechanism will move in. |
|
|
|
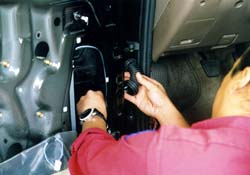
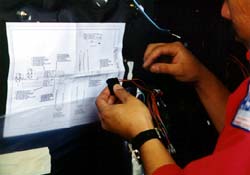
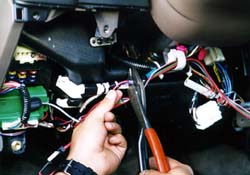
Following the instructions provided, our installer places the switch wires in their proper connectors. |
| The ground wire is connected to a factory mounting bolt in the left kickpanel. Care must be taken to choose a good body ground point. |
|
|
|
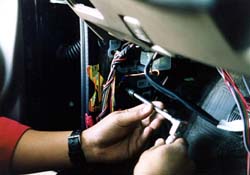
The power wire is attached to a large gauge wire coming from the ignition switch. This wire should have power only with the key on. |
| With the wiring completed, the plastic liner is reinstalled onto the door and the speaker is remounted. |
|
| This concludes the second phase of the
installaton. The completion of the installation is shown in part 3 PART 3 |
Ready to Order?
Need Prices?
Use our Online Catalog & Application Guide!
![]()
We have thousands of items in stock and ready
to ship!
A1 Electric Automotive Accessories
Local (310) 328-8500 Toll Free (888) 838-0506
Contact A1 Electric by Email
Ready to checkout?

SHOPPING CART
Home |
Company Information |
Ordering Information |
FAQ's
Electric Life Power Windows |
Installation Articles |
MES Power Door Locks
Alarms & Keyless Entry |
Power Window Switches |
OE Window Lift Motors |
Colibri Power Windows
Accessories & Pop Door Kits |
Street Rod Window Kits |
SPAL |
Classic Car Windows |
Speedometer |
Links to other Sites
Tech Articles & Information
Mustang |
Chevelle |
Dodge Ram PU |
Door Lock Installs |
S10 Window Motor |
Maxima |
Grand Am |
Silverado Windows
Cable Locks |
Tacoma |
Tacoma Tech |
Ford F150 |
55 Chevy |
Volvo |
Chevy PU |
Camaro |
VW Golf |
Chevy PU
Chevy Astro |
Caravan |
VW Beetle |
Colibri-Astro |
Mopar |
Focus |
Silverado Door Locks