


| A1 Electric Automotive Accessories |
| Installing Power Windows in a New VW Beetle |
| HOME | ELECTRIC LIFE POWER WINDOWS | INSTALLATION ARTICLES | KEYLESS ENTRY & ALARM SYSTEMS |
| OE Replacement Motors | Switch Kits | Power Door Locks | Spal Accessories | Pop Doors | Colibri | Classic Car Windows |
| ONLINE CATALOG & APPLICATION GUIDE |
| The New Volkswagen Beetle is catching on like wildfire. They are everywhere you look. This Beetle was bought used without power windows. An Electric Life kit from A1 Electric and a few hours of work are all that's necessary to remedy this |
|---|
|
|
|
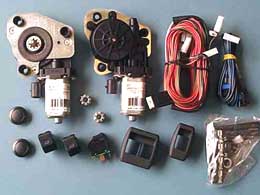
| The VK77-Kit for the New Beetle comes with 2 power units, switches, wiring and hole caps. Just about everything you'll need to complete the installation. Follow along and we'll show you how easy it is to have power windows in your Beetle. |
|
|
|
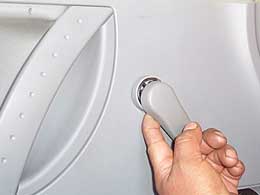
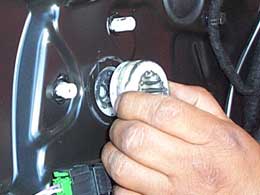
The old window handles are removed by grasping the ring under the handle and pulling it away from the knob as shown. The handle then lifts off its shaft. |
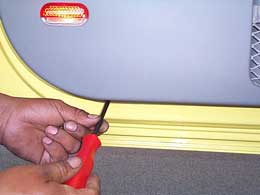
| The handle on the door panel has a cover that is clipped on. A small screwdriver needs to be placed into the small recesses between the handle top and bottom to pry it off. |
|
|
|
There is a large phillips head screw at the top and bottom of the handle that need to be removed. |
| There are also some screws along the bottom edge of the door that need to be removed. These screws have a Torx T20 head. |
|
|
|
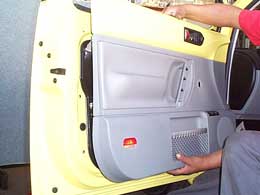
Carefully pry up the clips along the edges of the doorpanel using a doorpanel tool, bent scrapper with a v cut into the blade or a large screwdriver. Our installer is careful not to break any of the plastic clips. Any broken clips should be replaced with new ones obtained from a local dealership. |
| The door panel is then carefully lifted away from the door. |
|
|
|
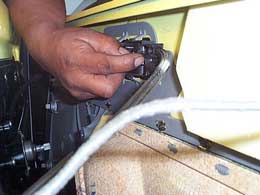
The cable linkage to the inside handle must be unclipped along with the wiring to the light and the door lock switch. |
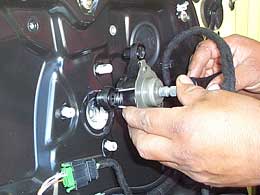
| 3 screws hold the crank mechanism onto the regulator. This crank drive mechanism and the regulator underneath, sandwich the sheet metal in the door. The 3 screws are removed using a Torx T30 driver. |
|
|
|
The drive mechanism is then lifted away from the door. Ours was stuck from age and needed a little coaxing with screwdriver. |
| If it didn't come off with the old drive, the plastic gear needs to be removed from the regulator. |
|
| This concludes the first phase of the installaton,
See part 2 for the completion of this installation. PART 2 |
Ready to Order?
Need Prices?
Use our Online Catalog & Application Guide!
![]()
We have thousands of items in stock and ready
to ship!
A1 Electric Automotive Accessories
Local (310) 328-8500 Toll Free (888) 838-0506
Contact A1 Electric by Email
Ready to checkout?

SHOPPING CART
Home |
Company Information |
Ordering Information |
FAQ's
Electric Life Power Windows |
Installation Articles |
MES Power Door Locks
Alarms & Keyless Entry |
Power Window Switches |
OE Window Lift Motors |
Colibri Power Windows
Accessories & Pop Door Kits |
Street Rod Window Kits |
SPAL |
Classic Car Windows |
Speedometer |
Links to other Sites
Tech Articles & Information
Mustang |
Chevelle |
Dodge Ram PU |
Door Lock Installs |
S10 Window Motor |
Maxima |
Grand Am |
Silverado Windows
Cable Locks |
Tacoma |
Tacoma Tech |
Ford F150 |
55 Chevy |
Volvo |
Chevy PU |
Camaro |
VW Golf |
Chevy PU
Chevy Astro |
Caravan |
VW Beetle |
Colibri-Astro |
Mopar |
Focus |
Silverado Door Locks